How to Create a Cinemagraph for Your Website
You’ve probably noticed a new crop of images sweeping the web. They’re not quite photographs and not exactly videos. They have the marks of high-quality photography but contain just a subtle hint of motion. Like a GIF, they’re looped videos that contain something moving ad infinitum, but what’s different is that everything else in the frame remains static. What is this new art form?
Is it a bird? Is it a plane?
A cinemagraph is a looped video clip layered beneath a photograph. In this way, the file size is minimized because all the other pixels in the frame remain static. As such, when the document is saved, it is not saving a video which usually is a much larger file size. Because it is a photograph containing just an area of motion, the file can be compressed more effectively and thus shared on the web more easily. That’s essentially the point of it all – downsizing the file size so it can easily be accessed on a website.
Cinemagraphs are not a file format. They are GIF files. The distinction, though, comes in the fact that most GIFs you see on the web are looped video clips – usually clips taken from movies, TV shows or random YouTube vids. Cinemagraphs pair the cinema and photography, if you will – combining the two.
So how the hell do you make one? Well, for this tutorial, you will definitely need some basic Photoshop skills. I definitely cannot do Photoshop and its wizardry justice by being the one to teach you. But! The product makers themselves can – Adobe offers a Photoshop training course on their KnowHow website, and there are numerous websites out there that’ll teach you Photoshop basics.
For this walk-through, I’ll be using screenshots of the process using Photoshop CS5. This also supposes you already have a video clip ready to go. If you don’t have a video ready, I suggest you try the technique out using free stock video.
If you are planning on creating your own video, here are some key tips to keep in mind when shooting:
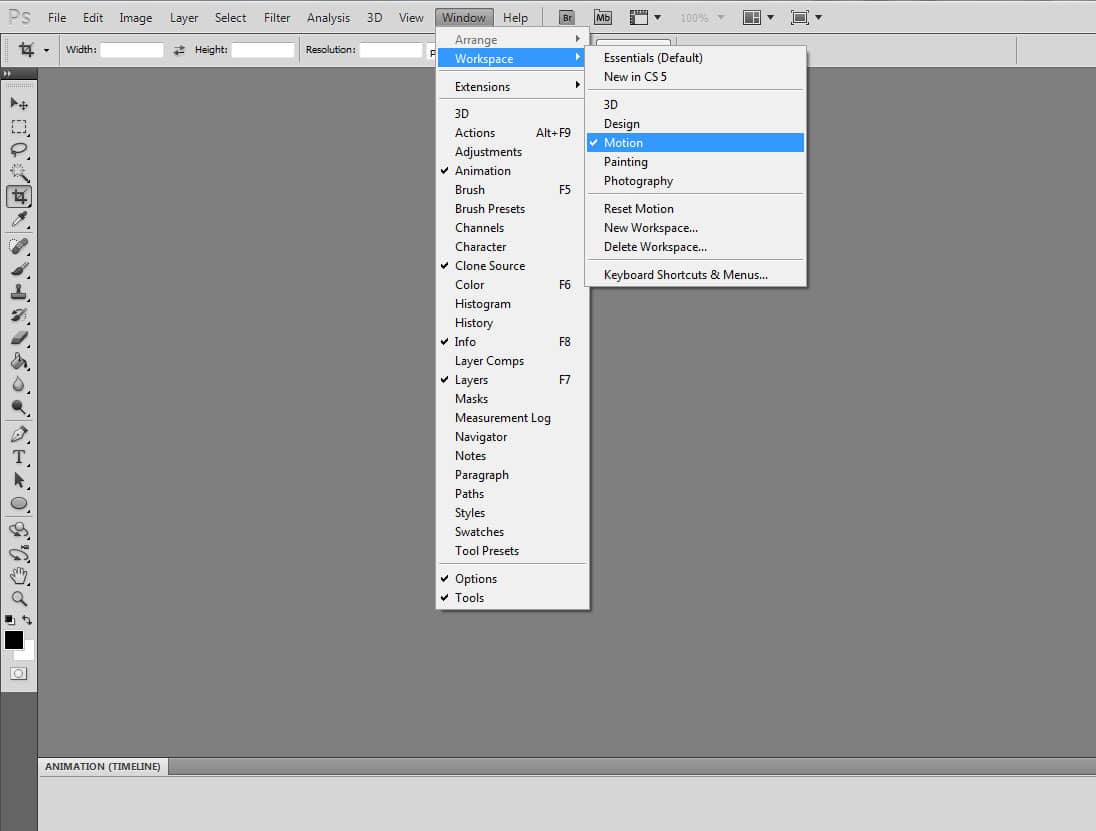
First thing, you want to have your Photoshop workspace window set to motion. Once you have done this, you will see the animation timeline come up in the program. The timeline is the area that allows you to play the video you import. To import the video, I just drag the file into the program, and you’ll see the timeline propagate the frames accordingly.
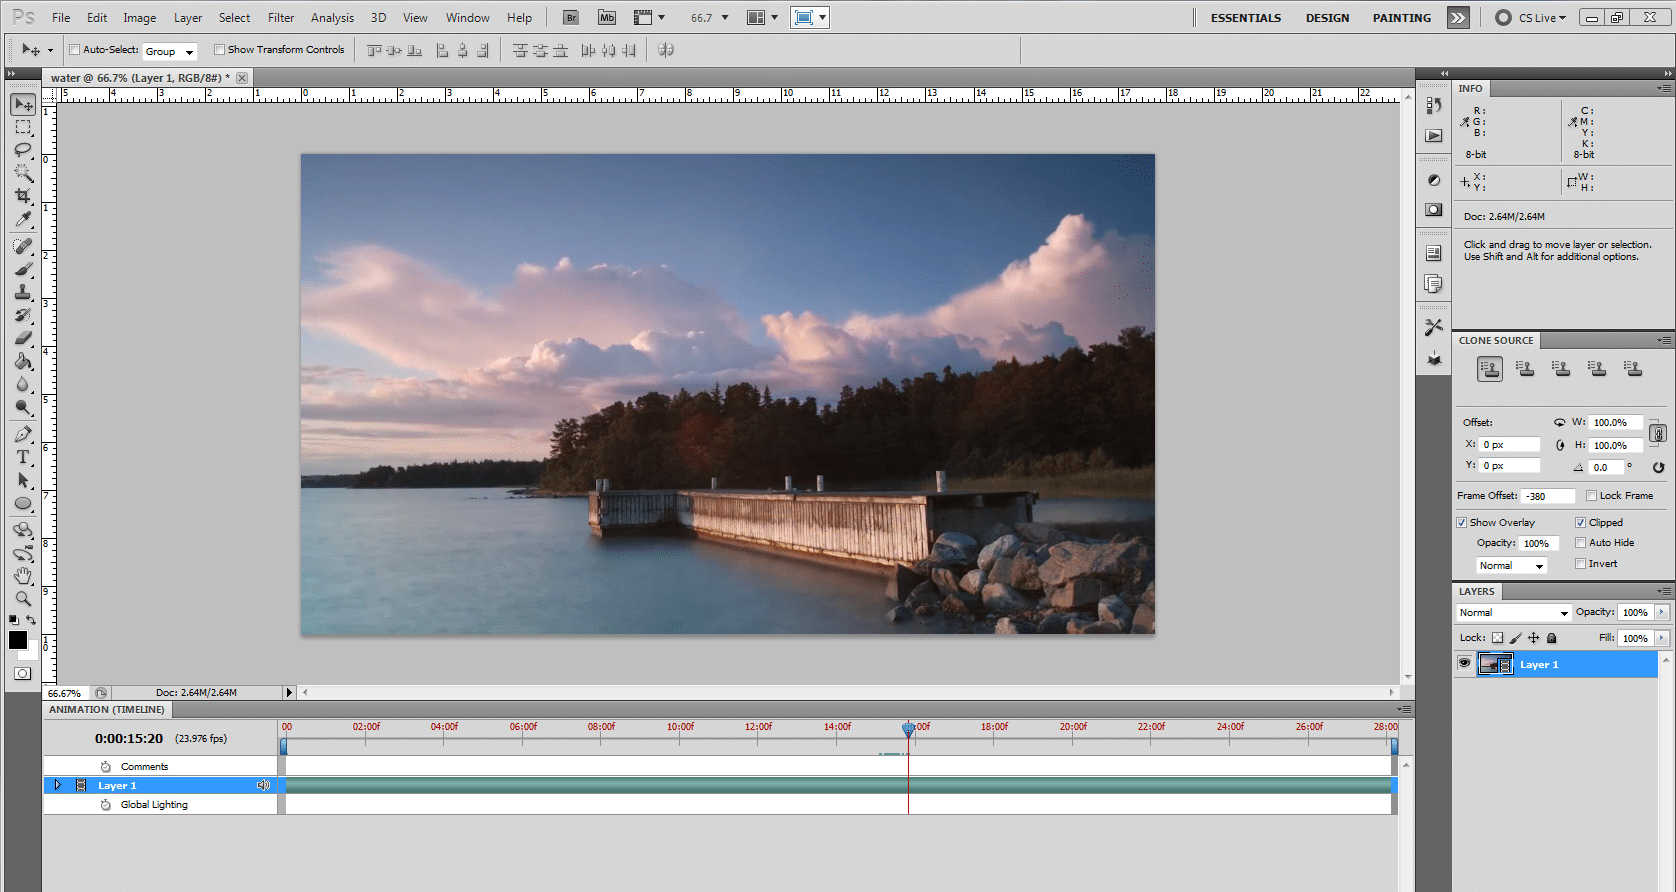
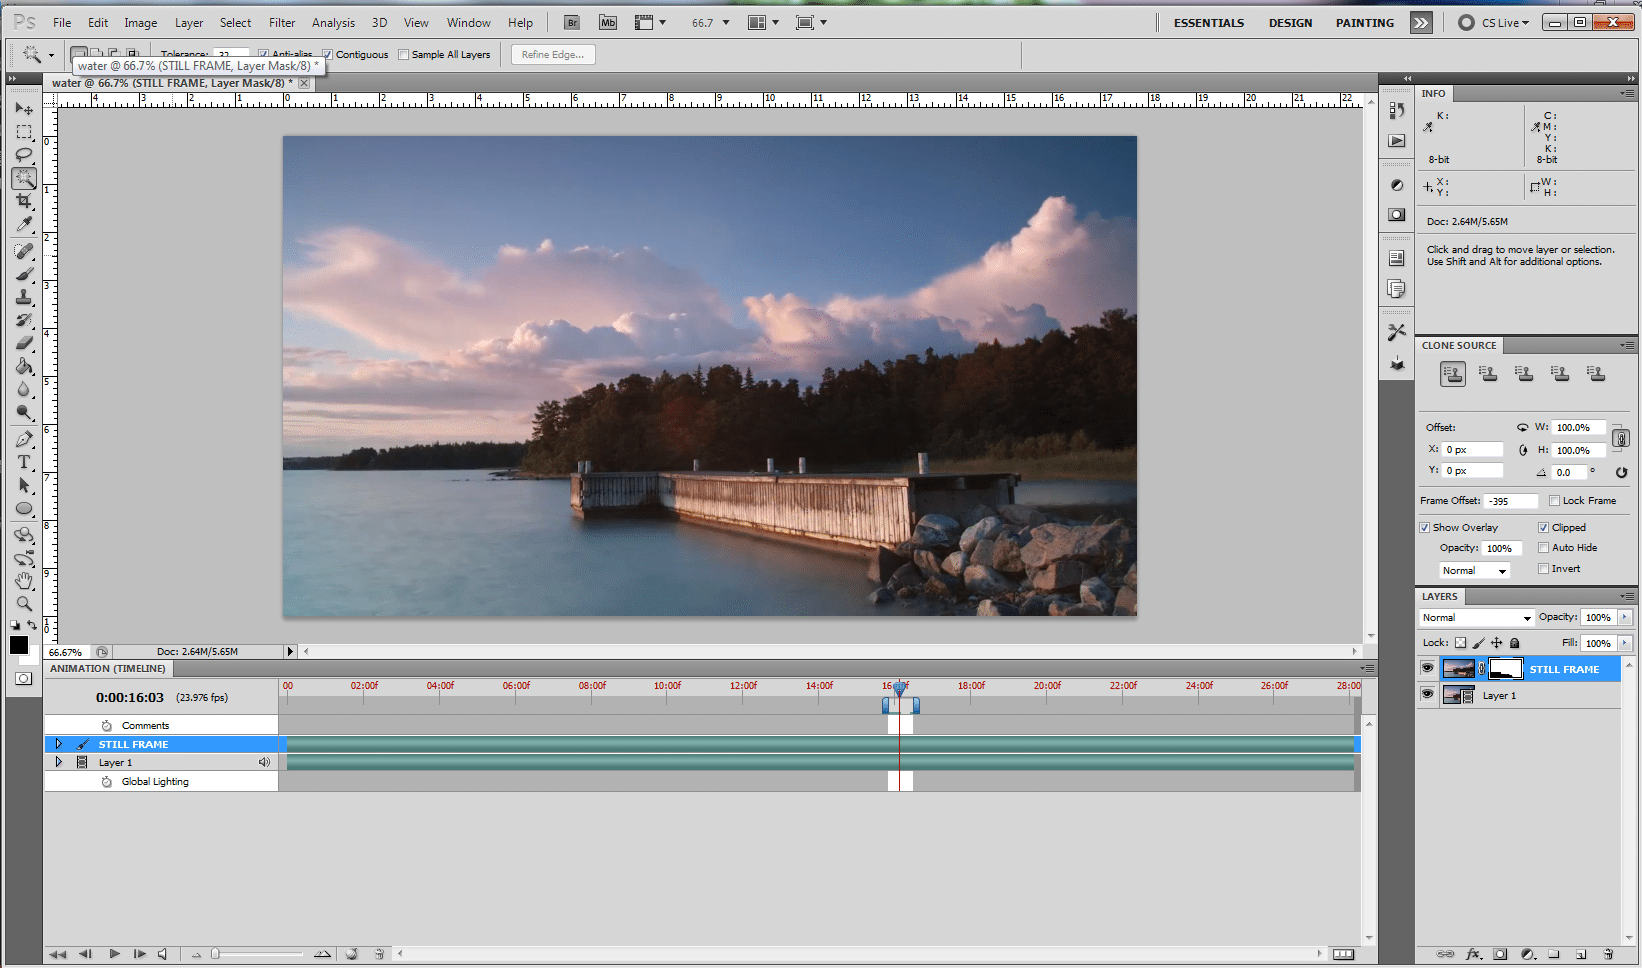
Now you’ll want to move the play head within your timeline to find the perfect still frame for your image from your video footage. Once you’ve found your perfect still frame, leave the play head where it is and select CRTL A to get the whole image and then CRTL J to copy the frame and create a new layer that is the still image.
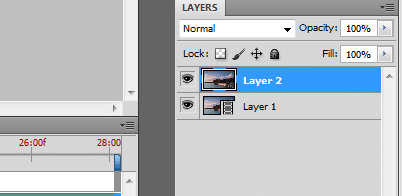
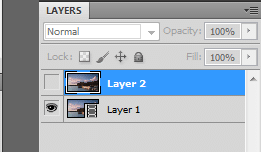
Once you have done this, you will notice that there is now a 2nd layer – this layer is your still frame. It is to this layer that you will be creating a mask, but first, we’ll need to select a portion of the video that we will be looping.
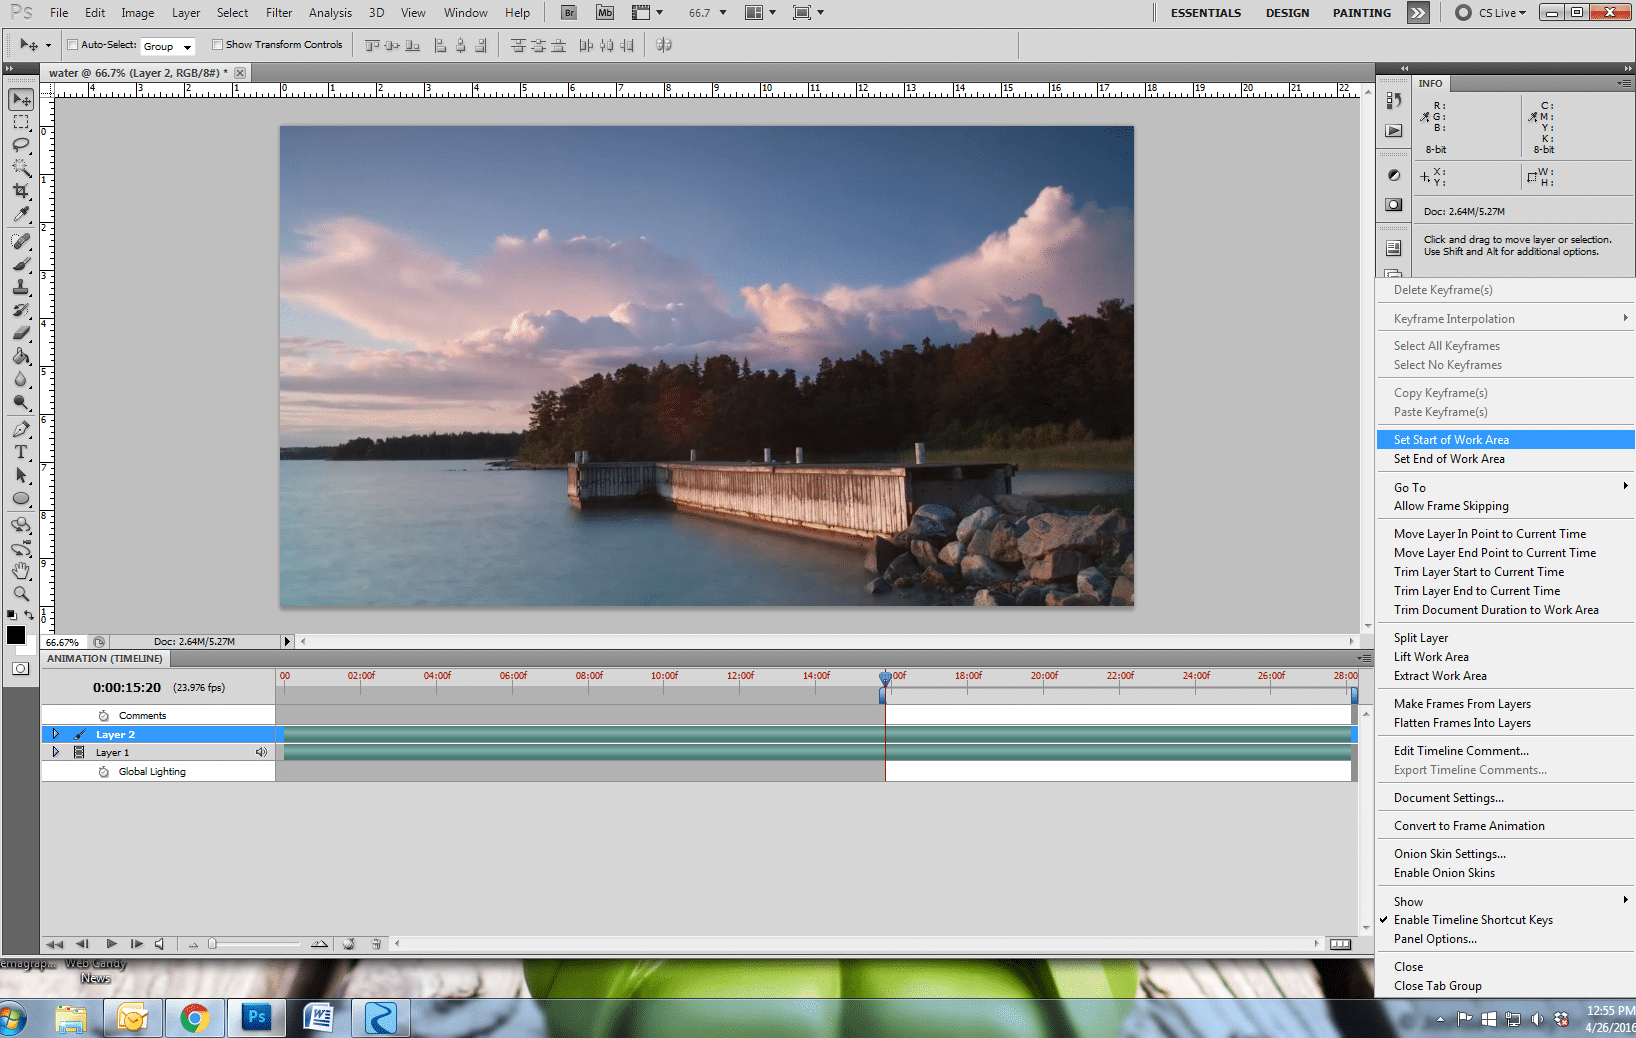
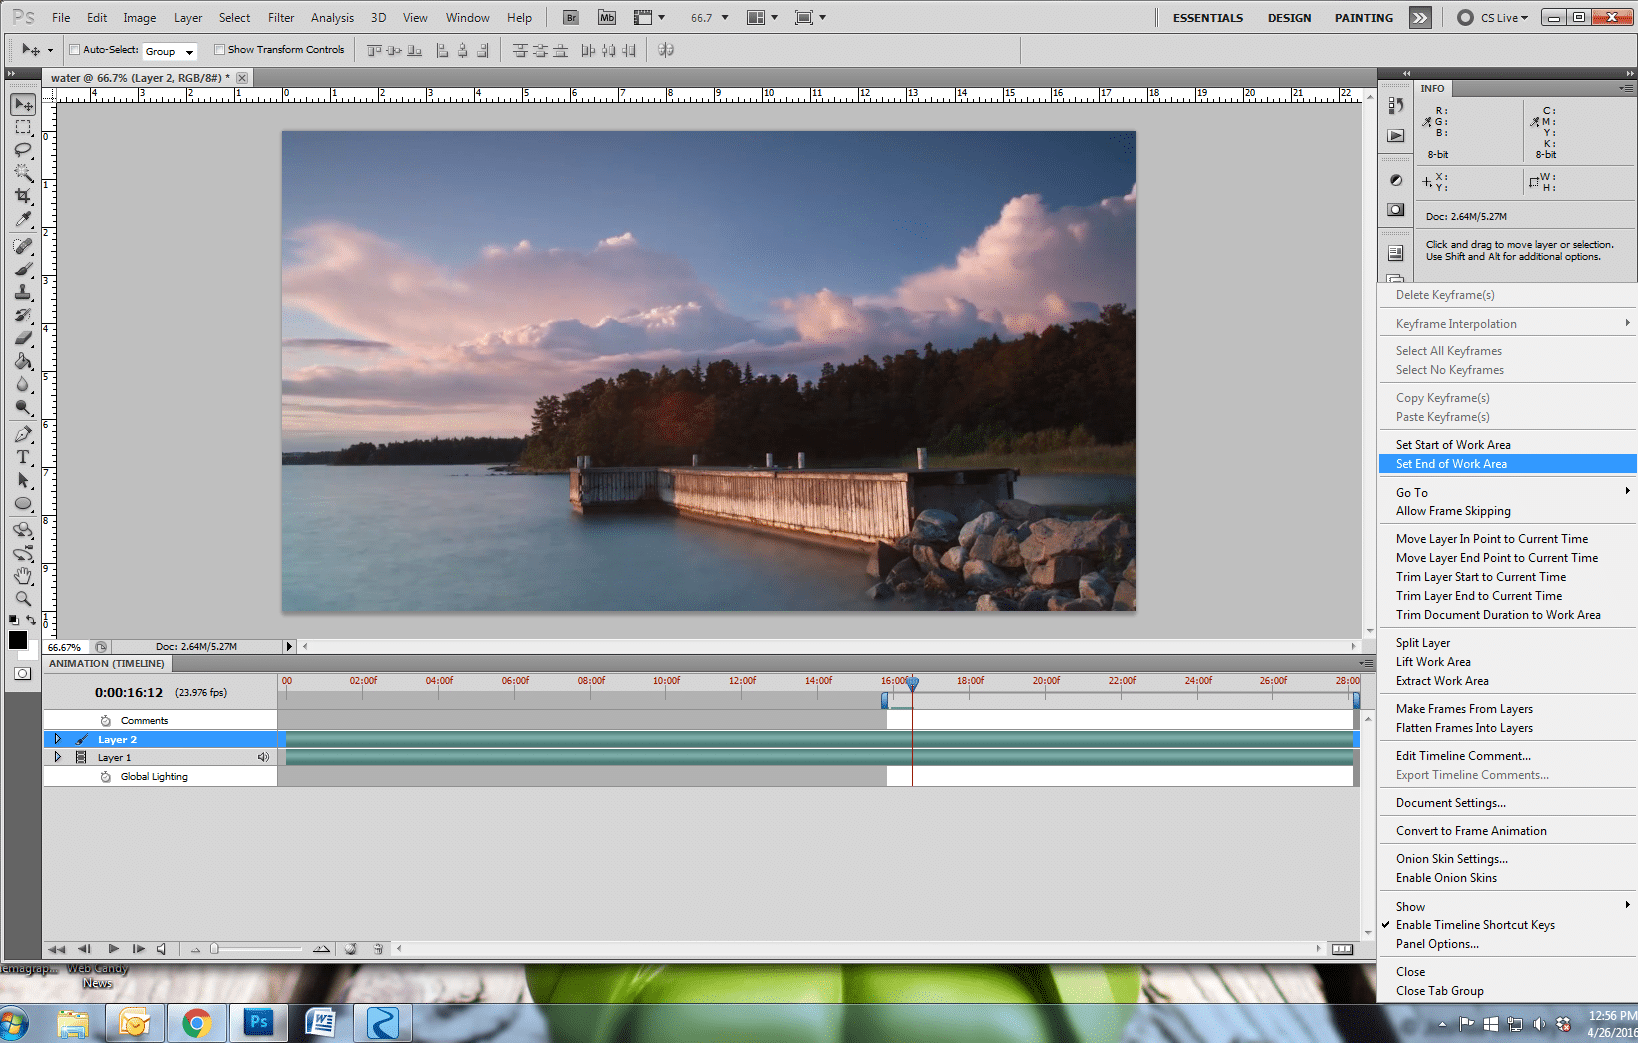
To do this, you’ll turn off the visibility of your second layer so you can watch the video. You will create the start and the end of your work area – your work area is all that will be exported when you save the file we are creating. To set the work area start time put your play head in the timeline to where you want the clip to start and then select the start work area. To create the end of the work area, select where you want the video clip to end using the play head and select end work area.
Note: You want to keep the video clip you are looping short try to keep it under 3 seconds if possible (so long as it contains the complete motion you are trying to loop, of course.)
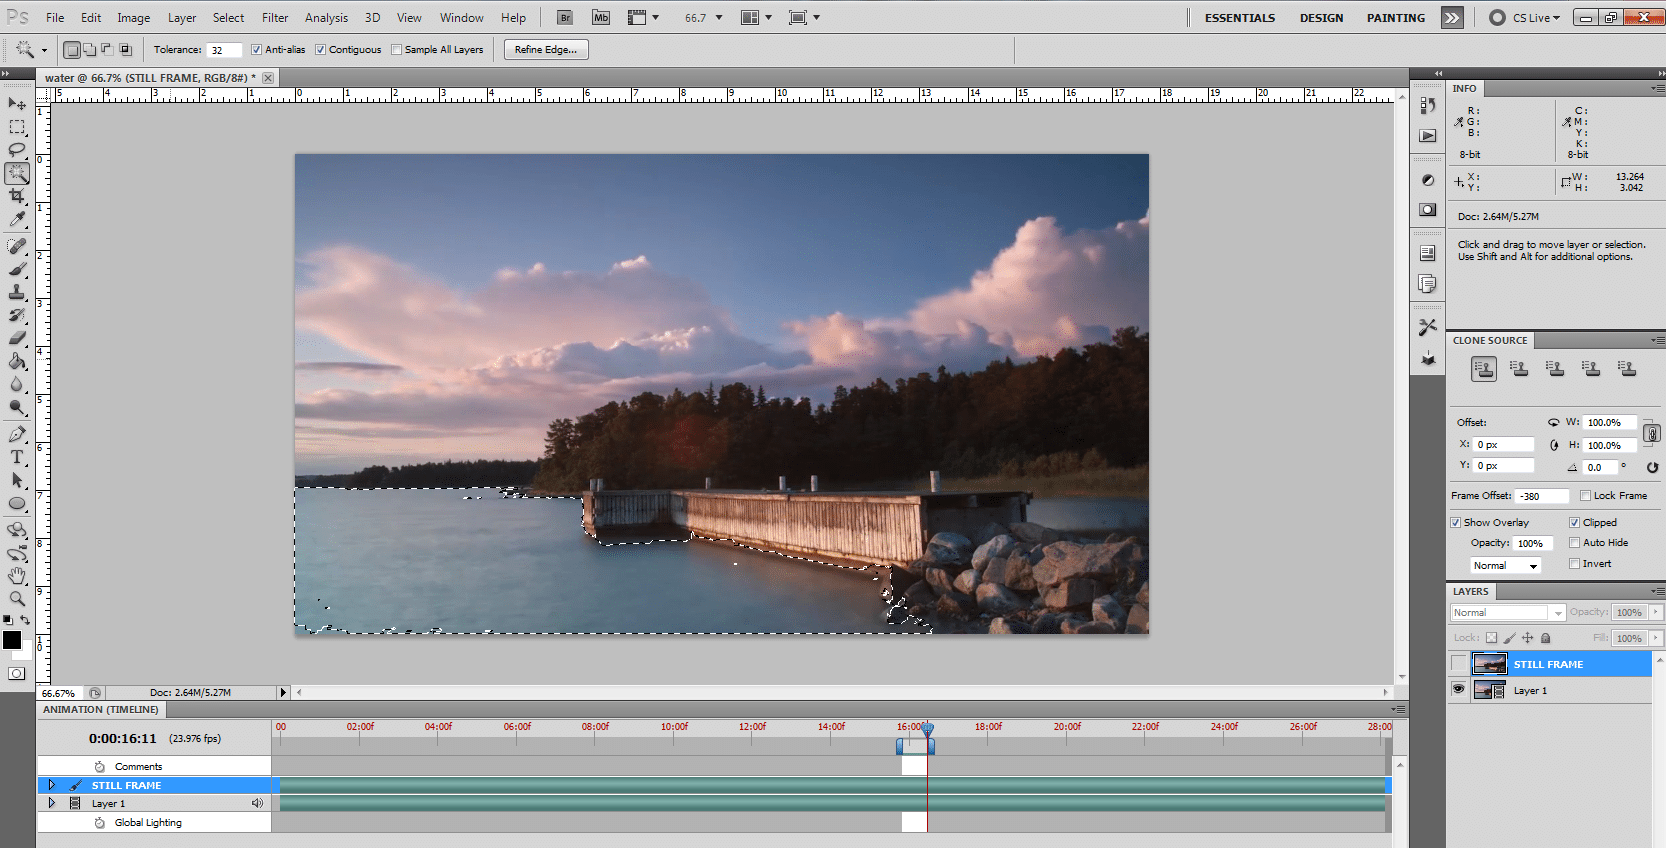
Now, what we’re going to do is make a “hole” in your still image by creating a layer mask. What this will do is reveal what is beneath the still frame, i.e. the video. Stay with me. To create the mask for this frame, you’ll want to select the still frame and then the magic wand tool. Using the magic wand tool, we’ll select the area that we want to isolate, i.e. the area of motion. In this example, we’re keeping the water moving.
With the area selected now, we’re going to create the mask layer. Click on the add vector mask key while holding down the ALT key. It’s the icon at the bottom that looks like a rectangle with a little circle inside. By holding down the ALT key while you create a mask, you are ensuring you are putting a hole in the still frame. You want to make sure the foreground colour is set to black when you do this.
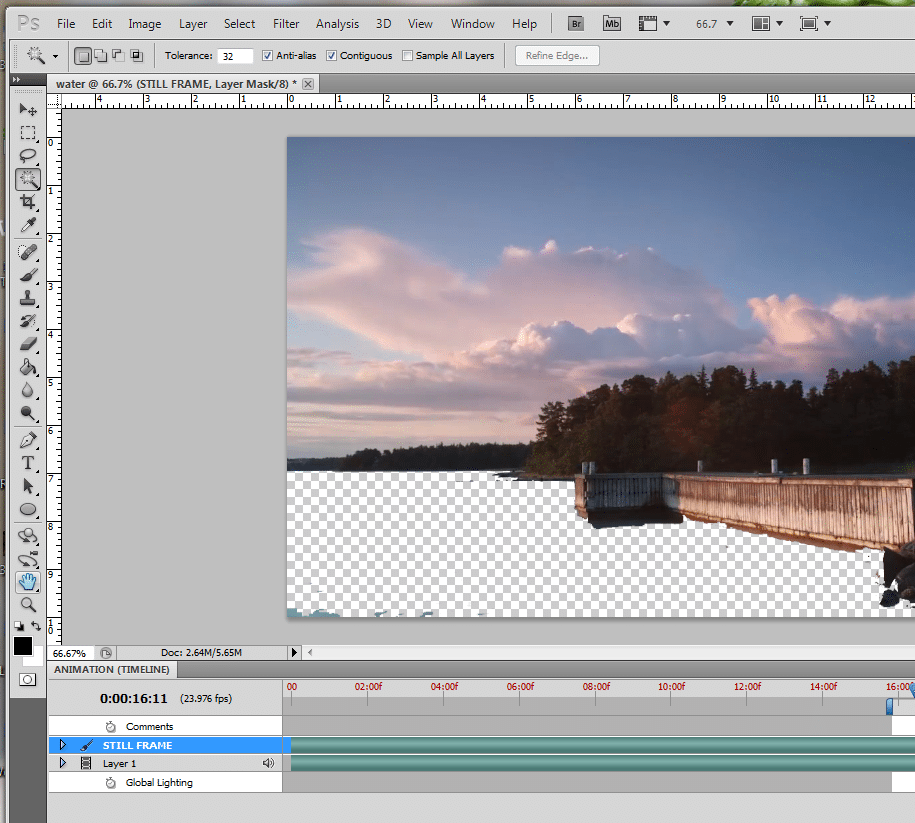
Once you have done this, you will now see that the area in your still image has a hole. Once you turn on the visibility for your video layer, you will see the video play again in the ‘hole.’
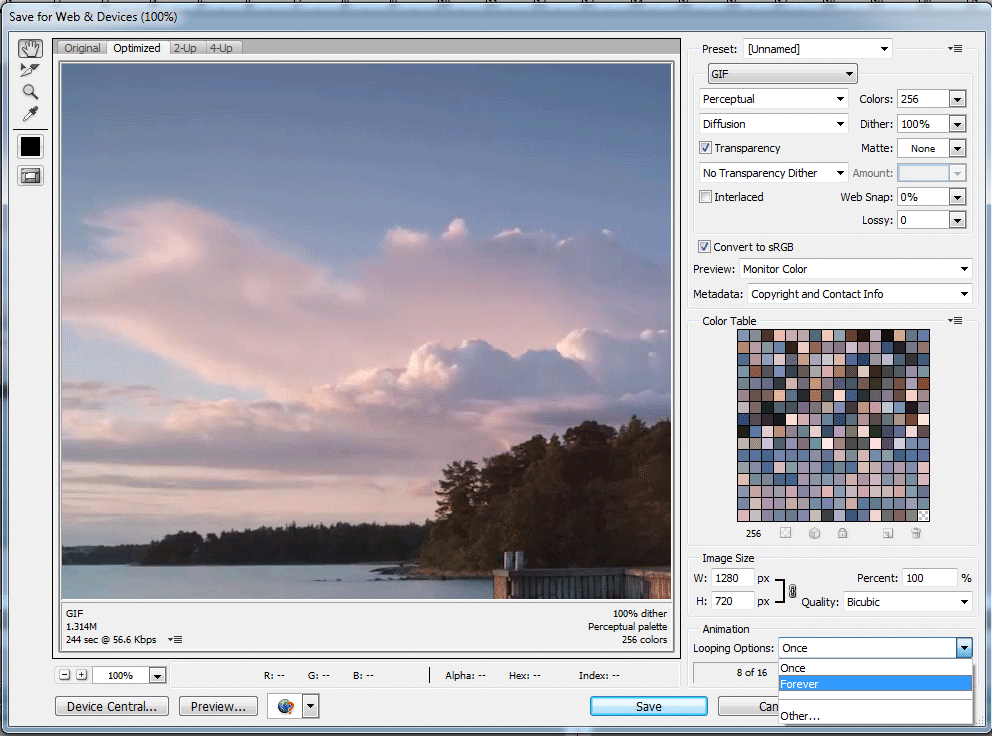
Now you can save your work. Go to file -> Save for Web & Devices.
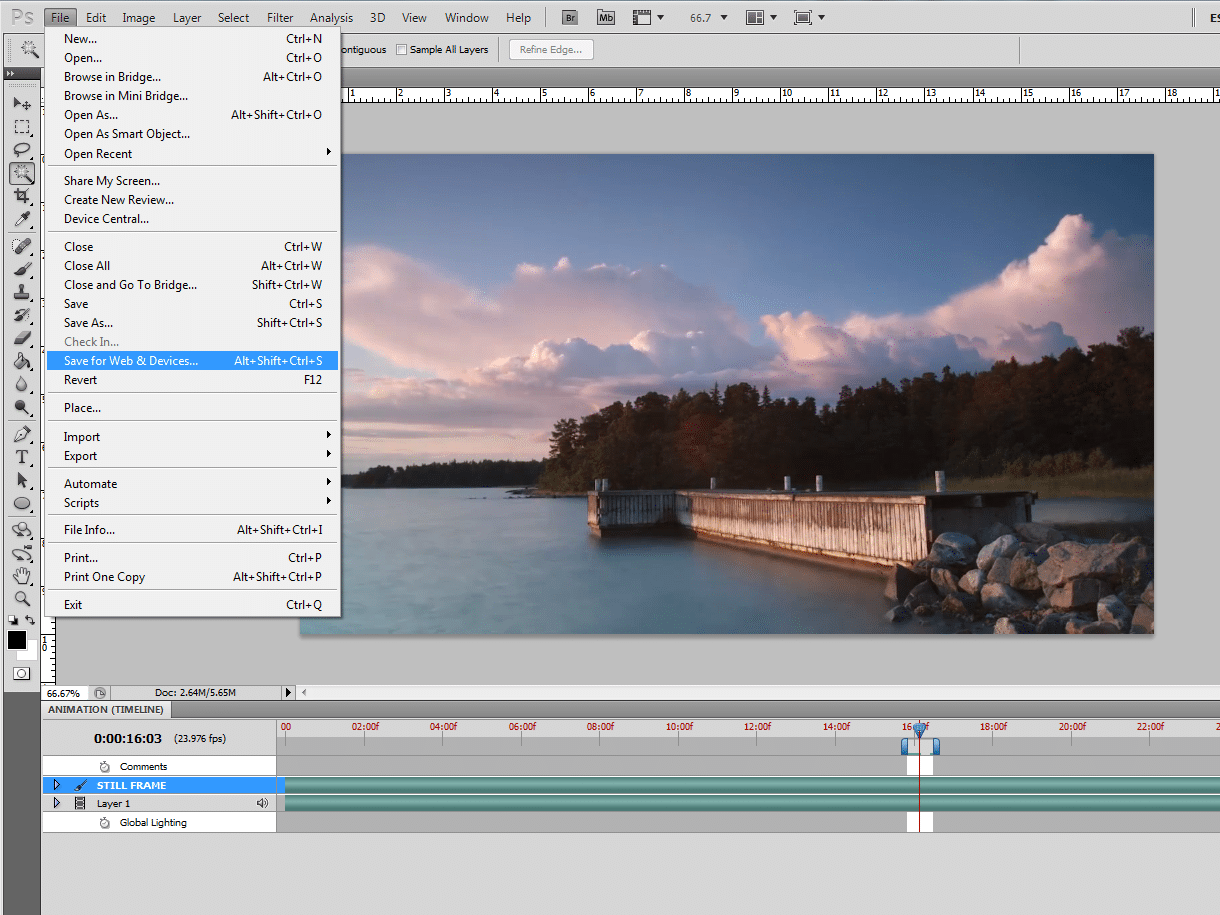
You want to save your video as a GIF.
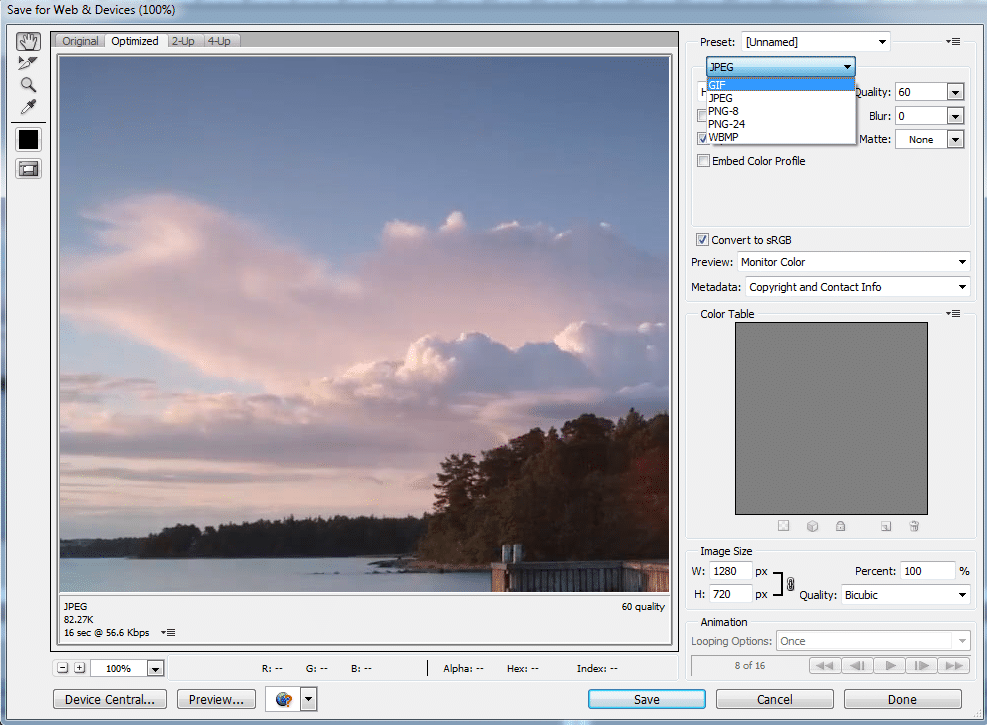
In the bottom left you can see how big the file is. You can play with the image size dimensions on your right to get the file size down smaller. And in this area you MUST set looping options to “forever” so that your video continuously loops underneath the photo.
Click Save and you’ve made your first cinemagraph!
Unlock the power of cinemagraphs with Blue Ocean Interactive Marketing! Elevate your brand's digital presence and captivate your audience like never before. Cinemagraphs bring a unique blend of motion and stillness to your visual content, creating unforgettable, mesmerizing experiences.
Don't let your brand blend into the background. Join us on this dynamic journey and see your stories come to life. Click here to start making waves with your marketing today!